Jetson Nano ROS Vision AI Part 2

Photo by h heyerlein on Unsplash
Live Video Inferencing Part 2 (SegNet)⌗
Our Goal: to create a ROS node that receives raspberry Pi CSI camera images, runs Image Segmentation and outputs the results as a message that we can view using rqt_image_view.
Semantic Image Segmentation⌗
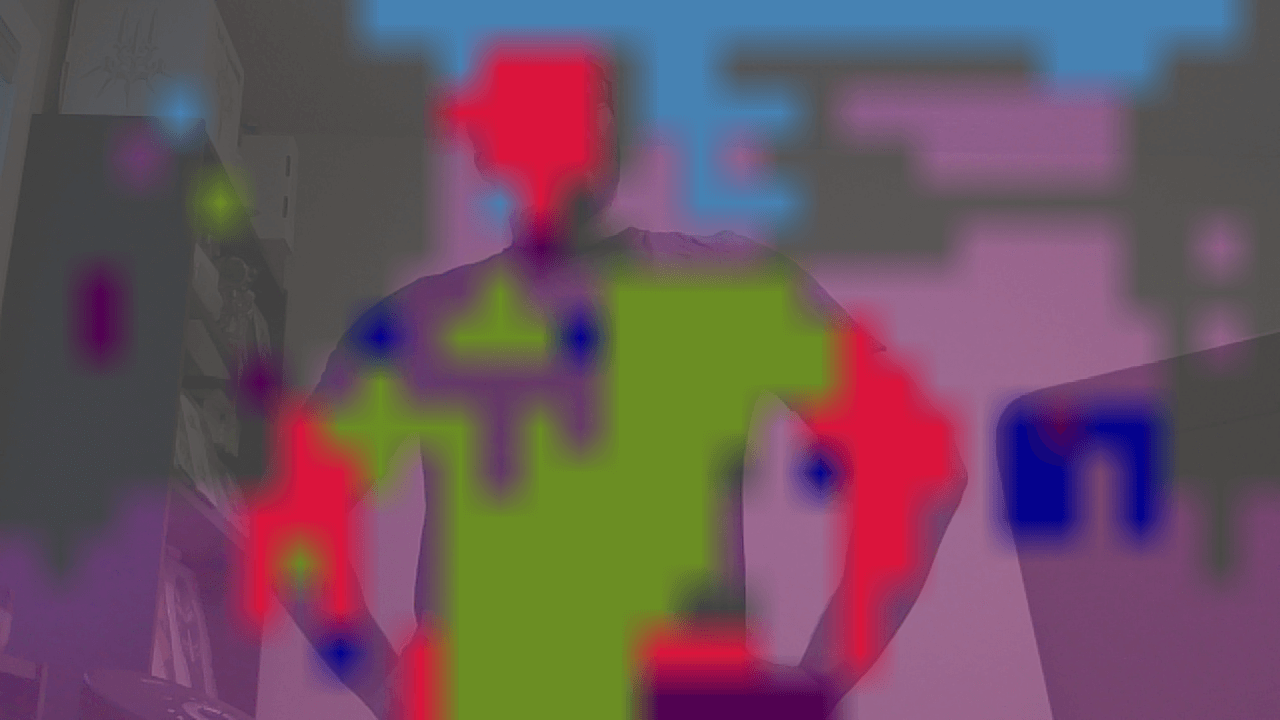
Unlike classification of a whole image, segmentation ocurs at a pixel level. It is more fine grained and draws overlay on the exact location of the object detected.
Pre-requisites⌗
Completed the previous post here
Live Video Inferencing (SegNet)⌗
If you have completed the previous tutorial then this code will look very similar.
First lets put down some segnet node code.
Create a file named node_imagetaker_segnet.cpp in your <catkin-workspace-location>/<package-name>/src/ directory
And add the following to it, we will describe what each portion of the code does
Let’s add our needed imports
#include <ros/ros.h>

#include <image_transport/image_transport.h>

// allows us to use open cv with our ROS image messages
#include <cv_bridge/cv_bridge.h>

#include <opencv2/imgproc/imgproc.hpp>
#include <opencv2/highgui/highgui.hpp>
#include <opencv2/imgcodecs.hpp>

#include <sensor_msgs/image_encodings.h>
#include <sensor_msgs/Image.h>

#include <vision_msgs/Detection2DArray.h>
#include <vision_msgs/VisionInfo.h>

// the API to our segmentation model
#include <jetson-inference/segNet.h>
// allows us to use the gpu for image operations
#include <jetson-utils/cudaMappedMemory.h>

#include <jetson-utils/loadImage.h>

#include "image_converter.h"
#include "image_ops.h"

#include <unordered_map>

using namespace cv;
using namespace std;
- add our globals
segNet* net = NULL;

// our segmentation filters
segNet::FilterMode overlay_filter = segNet::FILTER_LINEAR;
segNet::FilterMode mask_filter    = segNet::FILTER_LINEAR;

// image converters
imageConverter* input_cvt      = NULL;
imageConverter* overlay_cvt    = NULL;
imageConverter* mask_color_cvt = NULL;
imageConverter* mask_class_cvt = NULL;

// allow us to publish our 3 potential results from the model
ros::Publisher* overlay_pub    = NULL;
ros::Publisher* mask_color_pub = NULL;
ros::Publisher* mask_class_pub = NULL;
- add our image callback that will be called when we receive a message from the camera publisher. This is where the image will be passed into the AI model for inferencing
// input image subscriber callback
void img_callback( const sensor_msgs::ImageConstPtr& input )
{
    ROS_INFO ("Received Image");

    // convert sensor_msgs[rgb] to opencv[brg]
    cv_bridge::CvImagePtr cv_ptr;
    cv_bridge::CvImagePtr cv_ptr_flip; // pointer for flipped image
    try
    {
      cv_ptr = cv_bridge::toCvCopy(input, sensor_msgs::image_encodings::BGR8);
      cv_ptr_flip = cv_bridge::toCvCopy(input, sensor_msgs::image_encodings::BGR8);
    }
    catch (cv_bridge::Exception& e)
    {
      ROS_ERROR("cv_bridge exception: %s", e.what());
      return;
    }

    // we are doing a 180 deg flip since
    // my camera is upside down
    const int img_flip_mode_ = -1;
    // flip the image
    cv::flip(cv_ptr->image, cv_ptr_flip->image, img_flip_mode_);

    // convert converted image back to a sensor_msgs::ImagePtr
    // for use with nvidia / other ML algorithms
    sensor_msgs::ImagePtr flippedImage = cv_ptr_flip->toImageMsg();

    // convert the image TO reside on GPU
    // the converting TO and converting FROM are the SAME funtion name
    // with different signatures
    if( !input_cvt || !input_cvt->Convert(flippedImage) )
    {
        ROS_ERROR (
            "failed to convert %ux%u %s image",
            flippedImage->width,
            flippedImage->height,
            flippedImage->encoding.c_str()
        );
        return;
    }
    else {
        ROS_INFO (
            "Converted %ux%u %s image",
            flippedImage->width,
            flippedImage->height,
            flippedImage->encoding.c_str()
        );
    }

    // this is where the pass the image to the AI model
    // and generate the segmentation results
    const bool processed = net->Process(
        input_cvt->ImageGPU(),
        input_cvt->GetWidth(),
        input_cvt->GetHeight()
    );

    // process the segmentation network
    if (!processed)
    {
        ROS_ERROR(
            "failed to process segmentation on %ux%u image",
            flippedImage->width,
            flippedImage->height
        );
        return;
    }


    // color overlay
    save_overlay(input->width, input->height);

    // turn off the ones below for now
    // color mask
    save_mask_color(input->width, input->height);

    // class mask
    save_mask_class(net->GetGridWidth(), net->GetGridHeight());
}
- add our image processors and publishers, this is where we will apply the segmentation masks to the image and publish them
// put overlay on image and publish the image
bool save_overlay( uint32_t width, uint32_t height )
{
    ROS_INFO ("Starting to save image overlay");
    // assure correct image size
    if( !overlay_cvt->Resize(width, height) ) {
        return false;
    }

    // generate the overlay
    if( !net->Overlay(overlay_cvt->ImageGPU(), width, height, overlay_filter) ) {
        return false;
    }

    // populate the message
    sensor_msgs::Image msg;

    if( !overlay_cvt->Convert(msg, sensor_msgs::image_encodings::BGR8) ) {
        return false;
    }

    // publish image result
    overlay_pub->publish(msg);

    // save the image result
    //std::string suffix = "_mask_overlay";
    //save_msg_to_image(&msg, &suffix);
}

// put mask on image and publish it
bool save_mask_color( uint32_t width, uint32_t height )
{
    ROS_INFO ("Starting to save image mask color");
    // assure correct image size
    if( !mask_color_cvt->Resize(width, height) ) {
        return false;
    }

    // generate the overlay
    if( !net->Mask(mask_color_cvt->ImageGPU(), width, height, mask_filter) ) {
        return false;
    }

    // populate the message
    sensor_msgs::Image msg;

    if( !mask_color_cvt->Convert(msg, sensor_msgs::image_encodings::BGR8) ) {
        return false;
    }

    // publish image result
    mask_color_pub->publish(msg);

    // save the image result
    // std::string suffix = "_mask_color";
    // save_msg_to_image(&msg, &suffix);
}


// put the mask class on an image and publish it
bool save_mask_class( uint32_t width, uint32_t height )
{
    ROS_INFO ("Starting to save image mask class");
    // assure correct image size
    if( !mask_class_cvt->Resize(width, height) ) {
        return false;
    }

    // generate the overlay
    if( !net->Mask((uint8_t*)mask_class_cvt->ImageGPU(), width, height) ) {
        return false;
    }

    // populate the message
    sensor_msgs::Image msg;

    if( !mask_class_cvt->Convert(msg, sensor_msgs::image_encodings::MONO8) ) {
        return false;
    }

    // publish image result
    mask_class_pub->publish(msg);

    // save the image result
    // std::string suffix = "_mask_class";
    // save_msg_to_image(&msg, &suffix);
}
- finally our main function where we define our subscribers and publishers and initialize our node
int main (int argc, char **argv) {
    ros::init(argc, argv, "imagetaker_segnet");

    ros::NodeHandle nh;
    ros::NodeHandle private_nh("~");

    // can change this to another model you have
    // Below are some models I have downloaded
    std::string model_name = "fcn-resnet18-cityscapes-512x256";
    // std::string model_name = "fcn-resnet18-cityscapes-1024x512";
    // std::string model_name = "fcn-resnet18-deepscene-576x320";
    // std::string model_name = "fcn-resnet18-mhp-512x320";
    // std::string model_name = "fcn-alexnet-pascal-voc";
    // std::string model_name = "fcn-resnet18-sun-512x400";

    // use this so we can pass parameters via command line e.g
    // rosrun <package-name> imagetaker_segnet _model_name:=fcn-resnet18-cityscapes-512x256
    private_nh.param<std::string>(
        "model_name",
        model_name,
        "fcn-resnet18-cityscapes-512x256"
    );

    // retrieve filter mode settings
    std::string overlay_filter_str = "linear";
    std::string mask_filter_str    = "linear";

    overlay_filter = segNet::FilterModeFromStr(
        overlay_filter_str.c_str(),
        segNet::FILTER_LINEAR
    );
    mask_filter = segNet::FilterModeFromStr(
        mask_filter_str.c_str(),
        segNet::FILTER_LINEAR
    );

    // determine which built-in model was requested
    segNet::NetworkType model = segNet::NetworkTypeFromStr(model_name.c_str());

    if(model == segNet::SEGNET_CUSTOM)
    {
        ROS_ERROR(
            "invalid built-in pretrained model name '%s', defaulting to cityscapes",
            model_name.c_str()
        );
        model = segNet::FCN_ALEXNET_CITYSCAPES_HD;
    }

    // create network using the built-in model
    net = segNet::Create(model);

    if(!net)
    {
        ROS_ERROR("failed to load segNet model");
        return 0;
    }


    /*
     * create the class labels parameter vector
     */
    // hash the model path to avoid collisions on the param server
    std::hash<std::string> model_hasher;
    std::string model_hash_str =
        std::string(net->GetModelPath())+ std::string(net->GetClassPath());

    const size_t model_hash = model_hasher(model_hash_str);

    ROS_INFO("model hash => %zu", model_hash);
    ROS_INFO("hash string => %s", model_hash_str.c_str());

    // obtain the list of class descriptions
    std::vector<std::string> class_descriptions;
    const uint32_t num_classes = net->GetNumClasses();

    for( uint32_t n=0; n < num_classes; n++ )
    {
        const char* label = net->GetClassDesc(n);

        if( label != NULL ) {
            class_descriptions.push_back(label);
        }
    }

    /*
    * create image converters
    */
    input_cvt      = new imageConverter();
    overlay_cvt    = new imageConverter();
    mask_color_cvt = new imageConverter();
    mask_class_cvt = new imageConverter();

    if( !input_cvt || !overlay_cvt || !mask_color_cvt || !mask_class_cvt )
    {
        ROS_ERROR("failed to create imageConverter objects");
        return 0;
    }

    /*
    * advertise publisher topics
    */
    ros::Publisher overlay_publsh = private_nh.advertise<sensor_msgs::Image>("overlay", 2);
    overlay_pub = &overlay_publsh;

    ros::Publisher mask_color_publsh = private_nh.advertise<sensor_msgs::Image>("mask_color", 2);
    mask_color_pub = &mask_color_publsh;

    ros::Publisher mask_class_publsh = private_nh.advertise<sensor_msgs::Image>("mask_class", 2);
    mask_class_pub = &mask_class_publsh;


    /*
    * subscribe to image topic
    */
    ros::Subscriber img_sub = nh.subscribe(
        "/csi_cam_0/image_raw",
        5,
        img_callback
    );

    /*
    * wait for messages
    */
    ROS_INFO("segnet node initialized, waiting for messages");

    ros::spin();

    return 0;
}
Full code looks like (here)[https://github.com/neil-okikiolu/jetson-nano-ros-vision-ai/blob/master/src/node_imagetaker_segnet.cpp]
Then add the following to your <catkin-workspace-loaction>/<package-name>/CMakeLists.txt
add_executable(imagetaker_segnet
    src/node_imagetaker_segnet.cpp
    src/image_converter.cpp
    src/image_ops.cpp
)
target_link_libraries(imagetaker_segnet ${catkin_LIBRARIES} jetson-inference)
Verify⌗
Run catkin_make to compile your code and make sure no errors show up
If any errors show up, make a comment and I will try to help you with it
In a terminal run
roscore
In another terminal run
# we are running at 1280x720 @ 24 FPS for now
roslaunch jetson_csi_cam jetson_csi_cam.launch sensor_id:=0 width:=1280 height:=720 fps:=24
# if your camera is in csi port 1 change sensor_id to 1
- NOTE: you may see a warning about a camera calibration file, you can ignore it
In a third terminal run
# to check if we are getting images from the camera
rostopic list
# you should see /csi_cam_0/camera_info or /csi_cam_1/camera_info
rostopic hz /csi_cam_<0 or 1>/camera_info
You should see something like:
average rate: 1.937
    min: 0.516s max: 0.516s std dev: 0.00000s window: 2
average rate: 1.938
        min: 0.515s max: 0.516s std dev: 0.00048s window: 4
average rate: 1.937
        min: 0.515s max: 0.517s std dev: 0.00056s window: 6
average rate: 1.937
        min: 0.515s max: 0.517s std dev: 0.00048s window: 8
average rate: 1.937
        min: 0.515s max: 0.517s std dev: 0.00047s window: 10
average rate: 1.937
        min: 0.515s max: 0.517s std dev: 0.00045s window: 12
average rate: 1.937
        min: 0.515s max: 0.517s std dev: 0.00053s window: 14
...
In the third terminal Ctrl^c to stop the rostopic hz, now we will run our ROS node.
To specify a model, use _model_name parameter, you can omit it to run the default model
# specified model
rosrun <package-name> imagetaker_segnet _model_name:=fcn-resnet18-cityscapes-512x256
# run default model using
# rosrun <package-name> imagetaker_segnet
In rqt_image_view click the drop down and select either imagetaker_segnet/overlay, imagetaker_segnet/mask_color or imagetaker_segnet/mask_class to see the image segmentation results in real-time!

This was long, thanks for staying till this point. Come back later for more image inferencing
If you have any tips or questions feel free to leave a comment!
We will be doing image detection in Part 3!
Notes⌗
- the first time you run the node, it has to optimize the model in Tensor RT so it will go on for a couple of minutes
- just Wait
- on your next run, the model is cached and it will not take long to start up
- use
rqt_image_viewto recieve images in real time- if you are running the nano remotely, use SSH with the
-Xflag for forwarding the UI - e.g
ssh -X mynano@192.123.456.789
- if you are running the nano remotely, use SSH with the
Links to source code⌗
Full source code available on github