Jetson Nano ROS Vision AI

Photo by Maxime VALCARCE on Unsplash
Live Video Inferencing (ImageNet)⌗
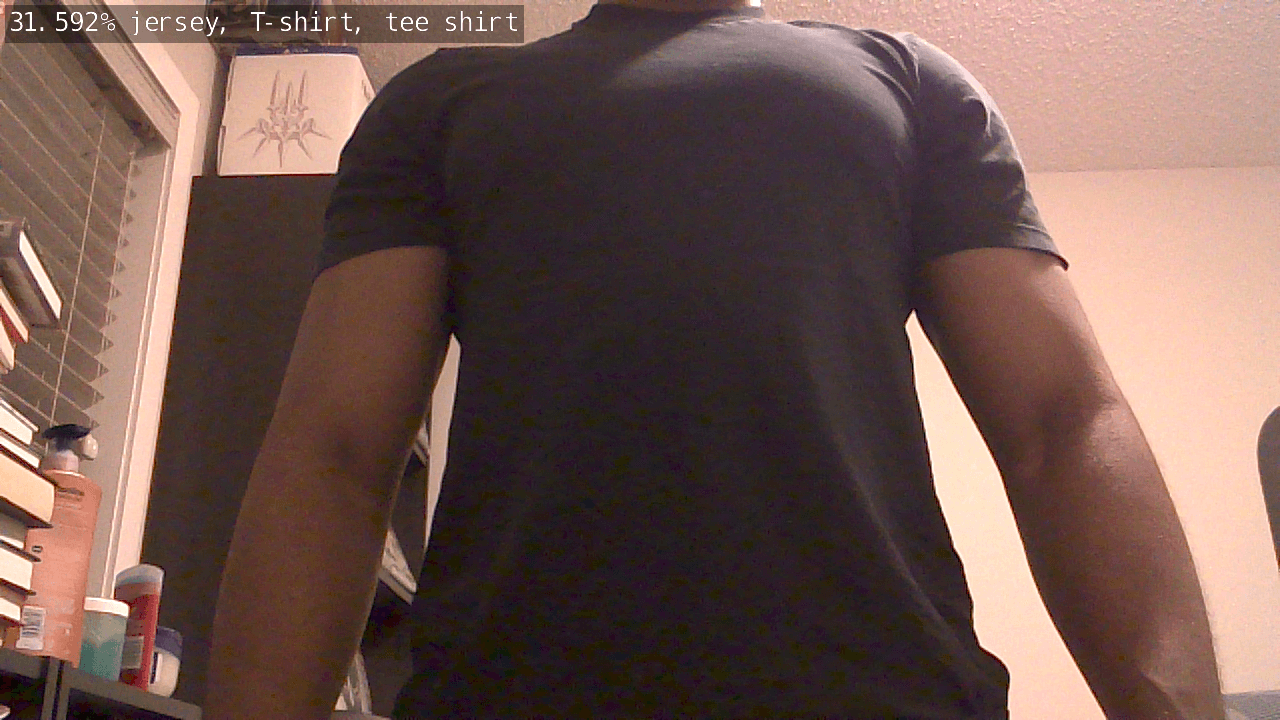
Our Goal: to create a ROS node that receives raspberry Pi CSI camera images, run some inferencing on the image (e.g. classification, segmentation or object detection) then outputs the result as a message that we can view using rqt_image_view.
Pre-requisites⌗
Hardware:
- Jetson Nano Dev kit with Jetpack 4.3 installed
- Raspberry Pi Camera V2
Software:
- ROS melodic - install instructions here
- ROS vision-opencv
# install ros vision-opencv sudo apt-get install ros-melodic-vision-opencv - Nvidia jetson-inferencing - install instructions here
- NOTE make sure to download at least one of each model type i.e one imagenet type model, one detectnet type model etc.
- If you want to run the model download tool again go
cd <jetson-inference path>/tools/ vi download-models.sh # or any text editor of your choice # change 'BUILD_INTERACTIVE=$1' to 'BUILD_INTERACTIVE="YES"' and save ./download-models.sh - Nvidia jetson-utils (courtesy of wagonhelm)
# install jeston-utils
sudo apt-get install libglew-dev
git clone https://github.com/dusty-nv/jetson-utils.git
cd jetson-utils
mkdir build && cd build
cmake ..
make
sudo make install
Get Nvidia Jetson CSI camera launcher for ROS
- Follow the instructions here
- NOTE before you run
catkin_make, make sure to:- download the vision_opencv repository from here
cd <path to vision_opencv download>/cv_bridge/include mkdir -p <catkin workspace location>/src/cv_bridge/include mv cv_bridge <catkin workspace location>/src/cv_bridge/include # make sure you have the 'cv_bridge' folder in <catkin workspace location>/src/cv_bridge/include # such that your folder structure is <catkin workspace location>/src/cv_bridge/include/cv_bridge (yes, ther are 2 'cv_bridge') - change the following line in
<catkin workspace location>/src/jetson_csi_cam/jetson_csi_cam.launch<!-- REMOVE THIS XML TAG --> <env name="GSCAM_CONFIG" value="nvcamerasrc sensor-id=$(arg sensor_id) ! video/x-raw(memory:NVMM), width=(int)$(arg width), height=(int)$(arg height), format=(string)I420, framerate=(fraction)$(arg fps)/1 ! nvvidconv flip-method=2 ! video/x-raw, format=(string)BGRx ! videoconvert ! video/x-raw, format=(string)BGR" /> <!-- ADD THIS XML TAG --> <env name="GSCAM_CONFIG" value="nvarguscamerasrc sensor-id=$(arg sensor_id) ! video/x-raw(memory:NVMM), width=(int)$(arg width), height=(int)$(arg height), format=(string)NV12, framerate=(fraction)$(arg fps)/1 ! nvvidconv flip-method=2 ! video/x-raw, format=(string)BGRx ! videoconvert" />
- download the vision_opencv repository from here
Verify⌗
Run catkin_make and make sure no errors show up
If any errors show up, make a comment and I will try to help you with it
In a terminal run
roscore
In another terminal run
# we are running at 1280x720 @ 24 FPS for now
roslaunch jetson_csi_cam jetson_csi_cam.launch sensor_id:=0 width:=1280 height:=720 fps:=24
# if your camera is in csi port 1 change sensor_id to 1
- NOTE: you may see a warning about a camera calibration file, you can ignore it
In a third terminal run
# to check if we are getting images from the camera
rostopic list
# you should see /csi_cam_0/camera_info or /csi_cam_1/camera_info
rostopic hz /csi_cam_<0 or 1>/camera_info
You should see something like:
average rate: 1.937
    min: 0.516s max: 0.516s std dev: 0.00000s window: 2
average rate: 1.938
        min: 0.515s max: 0.516s std dev: 0.00048s window: 4
average rate: 1.937
        min: 0.515s max: 0.517s std dev: 0.00056s window: 6
average rate: 1.937
        min: 0.515s max: 0.517s std dev: 0.00048s window: 8
average rate: 1.937
        min: 0.515s max: 0.517s std dev: 0.00047s window: 10
average rate: 1.937
        min: 0.515s max: 0.517s std dev: 0.00045s window: 12
average rate: 1.937
        min: 0.515s max: 0.517s std dev: 0.00053s window: 14
...
If you see that then you have set everything up correctly, lets move on!
Imagenet⌗
-
All our code will be in C++
-
Download these 4 files and add them to
<your-package-name>/src -
Create a new file in
<your-package-name>/srccallednode_imagetaker_imagenet.cpp
Let’s add our needed imports
#include <ros/ros.h>

#include <image_transport/image_transport.h>

// allows us to use openCV with our ROS images
#include <cv_bridge/cv_bridge.h>
#include <opencv2/imgproc/imgproc.hpp>
#include <opencv2/highgui/highgui.hpp>
#include <opencv2/imgcodecs.hpp>

// ROS image message
#include <sensor_msgs/image_encodings.h>
#include <sensor_msgs/Image.h>

// classification message
#include <vision_msgs/Classification2D.h>
#include <vision_msgs/VisionInfo.h>

// our API for making inferences using imageNet
#include <jetson-inference/imageNet.h>

// helps us create overlays
#include <jetson-utils/cudaFont.h>
#include <jetson-utils/cudaMappedMemory.h>

// help us load images onto the GPU
#include "image_converter.h"
#include "image_ops.h"

#include <unordered_map>

using namespace cv;
using namespace std;
- add our globals
// globals
// our inference object
imageNet* net = NULL;
// a helper object used to interact with the GPU
// e.g put images on the GPU
imageConverter* cvt = NULL;

// our ros publisher that will publish images with inference results on them
ros::Publisher* result_pub    = NULL;
- add our image callback that will be called when we receive a message from the camera publisher
// input image subscriber callback
void img_callback( const sensor_msgs::ImageConstPtr& input )
{
    ROS_INFO ("Received Image");

    // convert sensor_msgs[rgb] to opencv[brg]
    cv_bridge::CvImagePtr cv_ptr;
    // cv_bridge::CvImagePtr cv_ptr_flip; // pointer for flipped image
    try
    {
        cv_ptr = cv_bridge::toCvCopy(
            input,
            sensor_msgs::image_encodings::BGR8
        );
        // extract the image we are going to flip to
        // cv_ptr_flip = cv_bridge::toCvCopy(
        //     input,
        //     sensor_msgs::image_encodings::BGR8
        // );
    }
    catch (cv_bridge::Exception& e)
    {
        ROS_ERROR("cv_bridge exception: %s", e.what());
        return;
    }

    // we are doing a 180 deg flip since
    // my camera is upside down
    const int img_flip_mode_ = -1;
    // flip the image [if your camera is upside down]
    // cv::flip(cv_ptr->image, cv_ptr_flip->image, img_flip_mode_);

    // convert converted image back to a sensor_msgs::ImagePtr
    // for use with nvidia / other ML algorithms

    // comment this line if you used the flipped image
    sensor_msgs::ImagePtr flippedImage = cv_ptr->toImageMsg();

    // uncomment this line if you used the flipped image
    // sensor_msgs::ImagePtr flippedImage = cv_ptr_flip->toImageMsg();

    // convert the image TO reside on GPU
    // the converting TO and converting FROM are the SAME funtion name
    // with different signatures
    if( !cvt || !cvt->Convert(flippedImage) )
    {
        ROS_ERROR (
            "failed to convert %ux%u %s image",
            flippedImage->width,
            flippedImage->height,
            flippedImage->encoding.c_str()
        );
        return;
    }
    else {
        ROS_INFO (
            "Converted %ux%u %s image",
            flippedImage->width,
            flippedImage->height,
            flippedImage->encoding.c_str()
        );
    }

    // classify the image
    float confidence = 0.0f;
    const int img_class = net->Classify(
        cvt->ImageGPU(),
        cvt->GetWidth(),
        cvt->GetHeight(),
        &confidence
    );


    // verify the output
    if( img_class >= 0 )
    {
        ROS_INFO(
            "classified image, %2.5f%% %s (class=%i)",
            confidence * 100.0f,
            net->GetClassDesc(img_class),
            img_class
        );


        // use font to draw the class description
        cudaFont* font = cudaFont::Create(adaptFontSize(flippedImage->width));

        if( font != NULL )
        {
            char overlay_str[512];
            sprintf(
                overlay_str,
                "%2.3f%% %s",
                confidence * 100.0f,
                net->GetClassDesc(img_class)
            );

            // use cuda to write the image class and it's confidence
            // on the output image
            font->OverlayText(
                (float4*)cvt->ImageGPU(),
                cvt->GetWidth(),
                cvt->GetHeight(),
                (const char*)overlay_str,
                10,
                10,
                make_float4(255, 255, 255, 255),
                make_float4(0, 0, 0, 100)
            );
        }

        // wait for GPU to complete work
        CUDA(cudaDeviceSynchronize());
    }
    else
    {
        // an error occurred if the output class is < 0
        ROS_ERROR(
            "failed to classify %ux%u image",
            flippedImage->width,
            flippedImage->height
        );
    }


    // populate the output message
    sensor_msgs::Image msg;

    // get our image back from the GPU
    if( !cvt->Convert(msg, sensor_msgs::image_encodings::BGR8) ) {
        return;
    }

    sensor_msgs::ImagePtr out_img_ptr;
    cv_bridge::CvImagePtr out_cv_img_ptr;
    try
    {
        out_img_ptr = boost::make_shared<sensor_msgs::Image>(msg);

        out_cv_img_ptr = cv_bridge::toCvCopy(
            out_img_ptr,
            sensor_msgs::image_encodings::BGR8
        );

        // publish image result
        result_pub->publish(msg);
    }
    catch (cv_bridge::Exception& e)
    {
        ROS_ERROR("cv_bridge exception: %s", e.what());
        return;
    }
}
- finally our main function
int main (int argc, char **argv) {
    // our node name
    ros::init(argc, argv, "imagetaker_imagenet");

    ros::NodeHandle nh;
    // for command line parameters
    ros::NodeHandle private_nh("~");

    // can change this to another model you have
    // Below are some models we have downloaded
    std::string model_name = "googlenet";
    // std::string model_name = "resnet-18";

    // use this so we can pass parameters via command line e.g
    // rosrun <package-name> imagetaker_imagenet _model_name:=googlenet
    private_nh.param<std::string>(
        "model_name",
        model_name,
        "googlenet"
    );

    // determine which built-in model was requested
    imageNet::NetworkType model = imageNet::NetworkTypeFromStr(
        model_name.c_str()
    );

    if(model == imageNet::CUSTOM)
    {
        ROS_ERROR(
            "invalid built-in pretrained model name '%s', defaulting to googlenet",
            model_name.c_str()
        );
        model = imageNet::GOOGLENET;
    }

    // create network using the built-in model
    net = imageNet::Create(model);

    if(!net)
    {
        ROS_ERROR("failed to load imageNet model");
        return 0;
    }


    /*
     * create the class labels parameter vector
     */
    // hash the model path to avoid collisions on the param server
    std::hash<std::string> model_hasher;
    std::string model_hash_str =
        std::string(net->GetModelPath())+ std::string(net->GetClassPath());

    const size_t model_hash = model_hasher(model_hash_str);

    ROS_INFO("model hash => %zu", model_hash);
    ROS_INFO("hash string => %s", model_hash_str.c_str());

    // obtain the list of class descriptions
    std::vector<std::string> class_descriptions;
    const uint32_t num_classes = net->GetNumClasses();

    for( uint32_t n=0; n < num_classes; n++ )
    {
        class_descriptions.push_back(net->GetClassDesc(n));
    }

    /*
    * create image converters
    */
    cvt = new imageConverter();

    if(!cvt)
    {
        ROS_ERROR("failed to create imageConverter object");
        return 0;
    }

    /*
    * advertise publisher topics
    */
    ros::Publisher result_publsh = private_nh.advertise<sensor_msgs::Image>("image_classifications", 2);
    result_pub = &result_publsh;


    /*
    * subscribe to image topic
    * if your camera is on csi port 1,
    * subscribe to "/csi_cam_1/image_raw"
    */
    ros::Subscriber img_sub = nh.subscribe(
        "/csi_cam_0/image_raw",
        5,
        img_callback
    );

    /*
    * wait for messages
    */
    ROS_INFO("imagenet node initialized, waiting for messages");

    ros::spin();

    return 0;
}
- add this to your
CMakeLists.txt
add_executable(imagetaker_imagenet
    src/node_imagetaker_imagenet.cpp
    src/image_converter.cpp
    src/image_ops.cpp
)
target_link_libraries(imagetaker_imagenet ${catkin_LIBRARIES} jetson-inference)
- compile node_imagetaker_imagenet.cpp using
catkin_make
- run the node using
rosrun <package-name> imagetaker_imagenet _model_name:=googlenet
# substitute googlenet for any imagenet model you have downloaded
- the first time you run the node, it has to build the AI model so it will go on for a couple of minutes
- just Wait
- on your next run, the model is cached and it will not take long to start up
- use
rqt_image_viewto recieve images in real time- if you are running the nano remotely, use SSH with the
-Xflag for forwarding the UI - e.g
ssh -X mynano@192.123.456.789
- if you are running the nano remotely, use SSH with the
- in
rqt_image_viewclick the drop down and selectimagetaker_imagenet/image_classifications - you should see a bounding box around objects with its object class written in the top right

- if you can see this image then you have successfully completed this tutorial
This was long, thanks for staying till this point. Come back later for more image detection and segmentation.
Also, this is my first time using ROS or CUDA, if you have any tips, feel free to leave a comment!
Links to source code⌗
Full source code available on github
If you have any errors, look around the repo as it has all the configurations, etc.